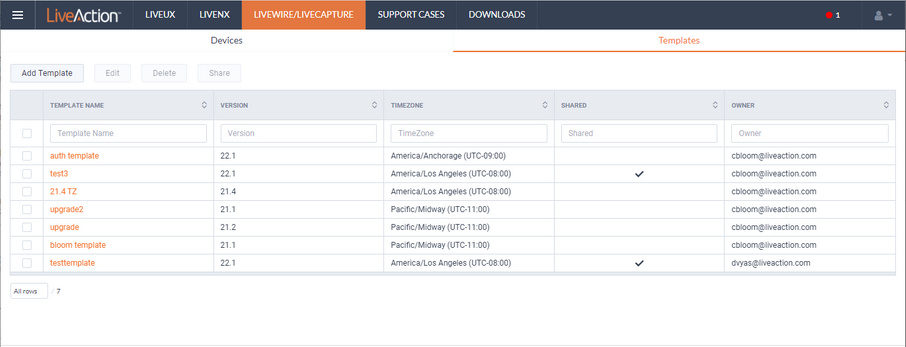
DMS Templates tab
The DMS Templates tab displays the templates associated with your account. Templates allow you to configure settings independent of a particular device, and then apply the template, and thus the settings, to a device, or multiple devices in bulk at the same time. A description of each of the available options and settings in the Templates tab is provided below:
Add Template
Click the button to display the ADD TEMPLATE dialog to add a new template to the configuration.
Settings
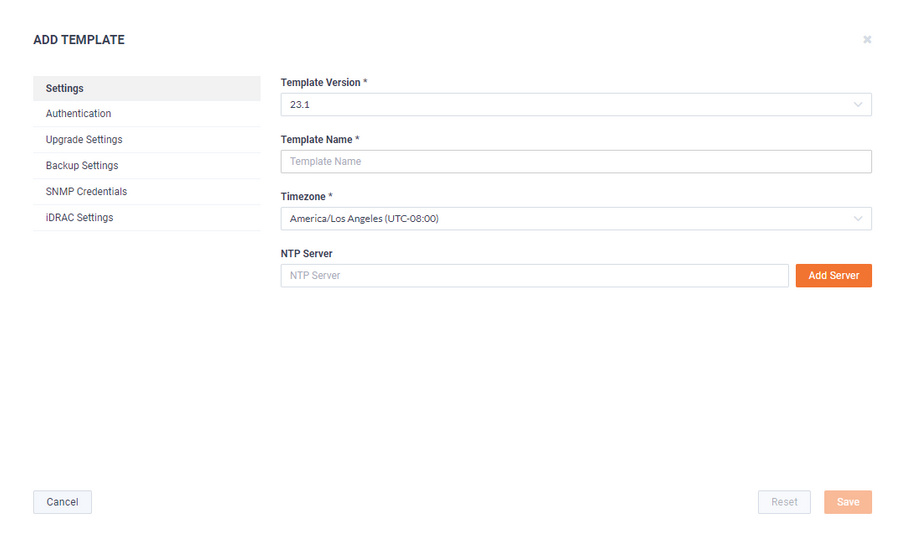
• Template Version: Click to select the version of the template you are configuring.
• Template Name: Type a name for the template.
• Timezone: Click to select the timezone for the template.
• NTP Server: Enter the address of any NTP servers to add to the configuration, and then click .
• NTP Servers: Displays the list of NTP servers added to Settings. You can click the icon to edit an NTP server in the list, or click the icon to remove an NTP server from the list.
Authentication
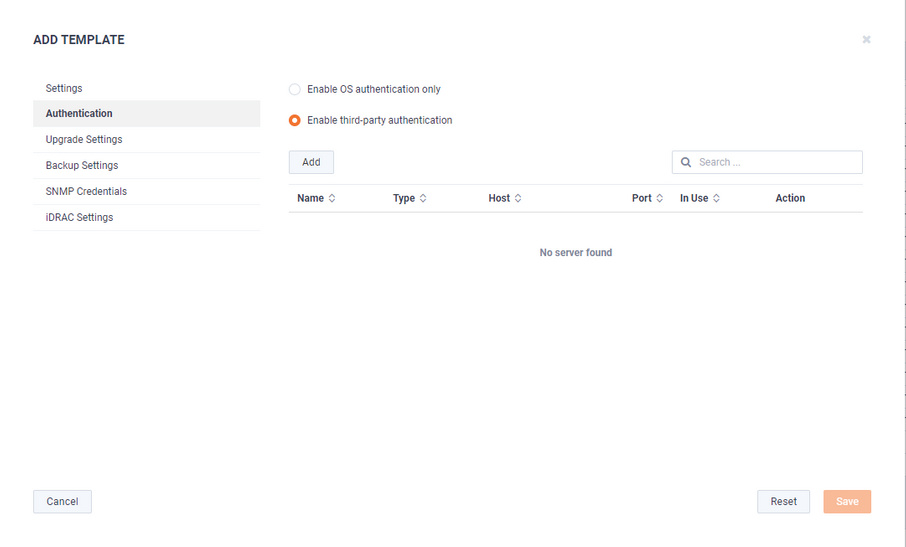
• Enable OS authentication only: Select this option to use the local OS authentication.
• Enable third-party authentication: Select this option to use TACACS+ or RADIUS authentication. If this option is selected, click to configure the new authentication setting.
• Add: Click to add a new authentication setting. You will need to configure the new authentication setting.
• Name: Displays the name of the authentication setting.
• Type: Displays the type of authentication, which can be either ‘RADIUS’ or ‘TACACS+.’
• Host: Displays the host of the authentication setting.
• Port: Displays the port of the authentication setting.
• Secret: Displays the secret key of the authentication setting.
• Use: Displays whether or not the authentication setting is in use.
• Save: Click to save the authentication setting.
• Search: yadayada.
Upgrade Settings
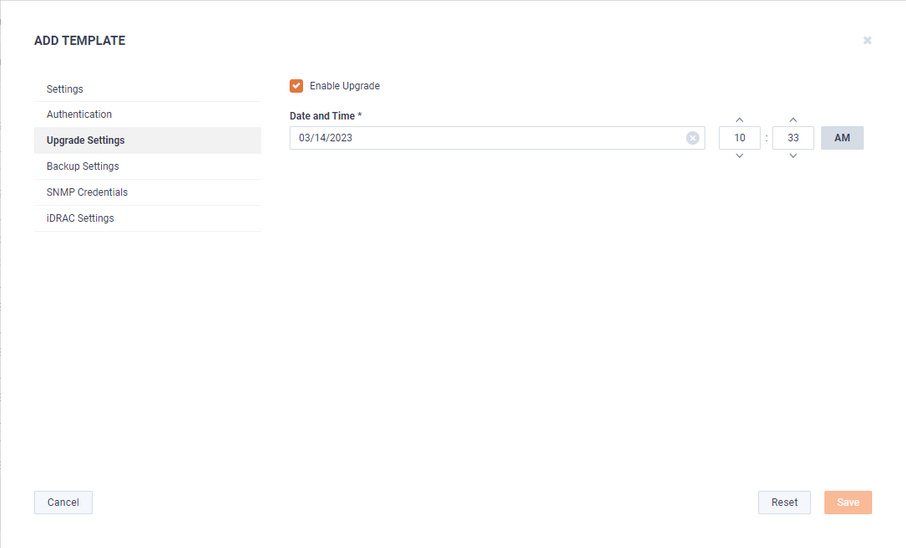
• Enable Upgrade: Select to enable the upgrade on the selected templates. If you enable the upgrade, you are presented with settings to specify the date and time the upgrade should take place.
Backup Settings
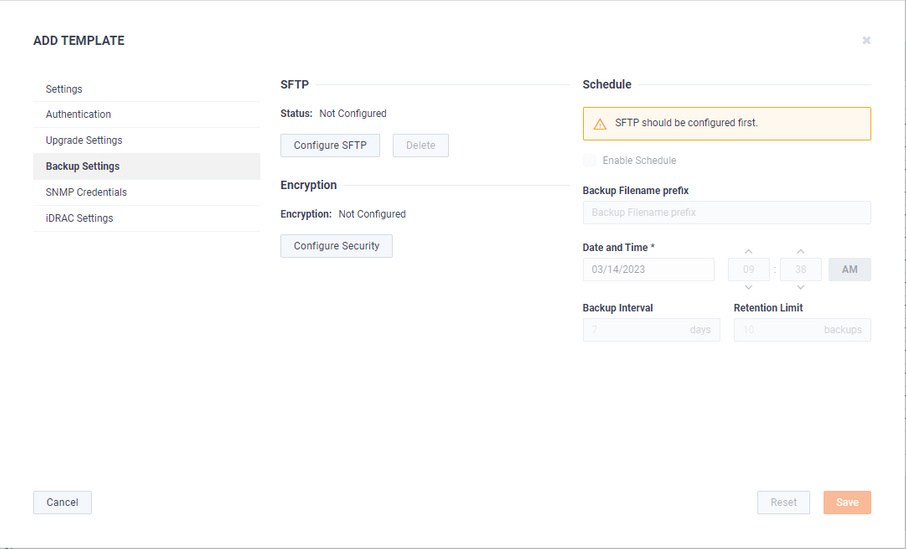
SFTP
• Configure SFTP: Click to configure the SFTP (Secure FTP) server for the backup.
• Hostname: Type the IP address of the SFTP server.
• Port: Type the port used for the SFTP Server.
• Username: Type a username.
• Password: Type the password again to verify the password.
• Directory: Type the directory where backups are saved on the SFTP server.
• Delete: Click to delete the configured SFTP server for the backup.
Schedule
• Enable Schedule: Click to enable scheduling for the backup.
• Backup Filename prefix: Type a prefix filename for the backup. Each scheduled backup that is created will append the prefix to the beginning of the backup filename.
• Date and Time: Click to configure the date and time the backup will complete.
• Backup Interval: Type the number of days between YADA.
• Retention Limit: Type the number backups to YADA.
Encryption
• Encryption: Displays whether or not encryption is configured for each scheduled backup.
• Configure Security: Click to configure security settings to encrypt each scheduled backup.
• Encrypt backups: Select this option to encrypt each scheduled backup.
• Password: Type the password to YADA.
• Repeat Password: Tye the password again to verify the password.
SNMP Credentials
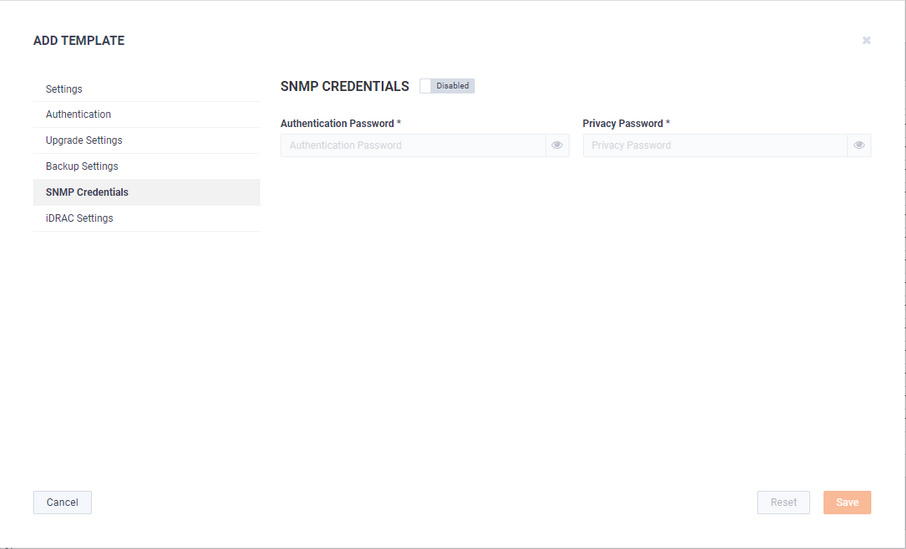
• Enabled/Disabled: Select to enable or disable the SNMP Credentials configured below for the Authentication Password and Privacy Password.
• Authentication Password: Type a new Authentication Password to change it from the default Authentication Password displayed in ‘LiveNX SNMP Configuration’ in LiveFlow.
• Privacy Password: Type a new Privacy Password to change it from the default Authentication Password displayed in ‘LiveNX SNMP Configuration’ in LiveFlow.
iDRAC Settings
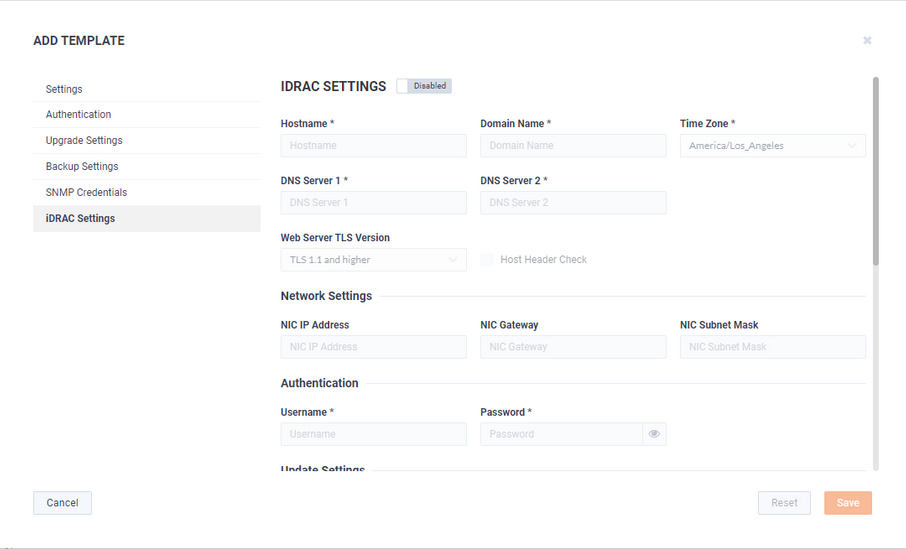
NOTE: Only selected options available from the iDRAC utility are available and configurable below. See also Integrated Remote Access Controller (iDRAC).
• Hostname: Displays the Hostname of the device. Type a new Hostname to change it.
• Domain Name: Displays the Domain Name of the device. Type a new Domain Name to change it.
• Time Zone: Displays the Time Zone of the device. Select a new Time Zone to change it.
• DNS Server 1: Displays the DNS Server used by the device. Enter a new DNS Server to change it.
• DNS Server 2: Displays the DNS Server used by the device. Enter a new DNS Server to change it.
• Web Server TLS Version: Displays the TLS protocol version support used by the device. You can select from the following: TLS 1.1 and Higher, TLS 1.2 and Higher, and TLS 1.3
• Host Header Check: Select to enable Host Header Check requests.
Network Settings:
• NIC IP Address: Displays the static NIC IP Address of the device. Type a new NIC IP Address to change it.
• NIC Gateway: Displays the NIC Gateway of the device. Type a new NIC Gateway to change it.
• NIC Subnet Mask: Displays the NIC Subnet Mask of the device. Type a new NIC Subnet Mask to change it.
Authentication:
• Username: Displays the Username of the device. Type a new Username to change it.
• Password: Configures the Password of the device. Type a new Password to change it.
Update Settings:
• Enable Updates: Select to enable updates on the device. If enabled, you must configure the Update Proxy Server, Update Proxy User, and Update Proxy Password.
• Update Proxy Server: Displays the Update Proxy Server of the device. Type a new Update Proxy Server to change it.
• Update Proxy User: Displays the Update Proxy User of the device. Type a new Update Proxy User to change it.
• Update Proxy Password: Displays the Update Proxy Password of the device. Type a new Update Proxy Password to change it.
SNMP:
• Enable SNMP: Select to enable the SNMP Agent on the iDRAC. If enabled, you must configure the SNMP Community.
• SNMP Community: Configures the SNMP Community name used for SNMP Agents. Type a new SNMP Community name to change it
• Enable SNMP Alert 1: Select to enable the SNMP Alert 1 on the iDRAC. If enabled, you must configure the Alert 1 Target Address.
• Alert 1 Target Address: Displays the IPv4, IPv6, FQDN address, or hostname of the target destination to receive alerts. Must be valid IPv4, IPv6, FQDN address, or hostname.
• Enable SNMP Alert 2: Select to enable the SNMP Alert 2 on the iDRAC. If enabled, you must configure the Alert 2. If enabled, you must configure the Alert 2 Target Address.
• Alert 2 Target Address: Displays the IPv4, IPv6, FQDN address, or hostname of the target destination to receive alerts. Must be valid IPv4, IPv6, FQDN address, or hostname.
NTP:
• Enable NTP: Select to enable an NTP server on the iDRAC. If enabled, you must configure the NTP Server.
• NTP Server: Displays the name or IP address of the NTP Server. Type a new name or IP address to change it.
Event Filters:
• Alert: Displays any iDRAC Event filters configured for the device.
• Add: Click to add a new Event filter configured in the text box. You must provide any parameters by defining what you want to be alerted to and how you want to be notified. You can configure as may event filter commands as you want. The general format of an alert category:
idrac.alert.category.[subcategory].[severity]
idrac.alert.category.[subcategory].[severity]
Edit
Click the button to edit the selected template. See also Add Template.
Delete
Click the button to delete the selected template.
Share
Click the button to share the selected template with other users who manage and configure appliances. You will need to add a user by completing the Manage Users dialog.
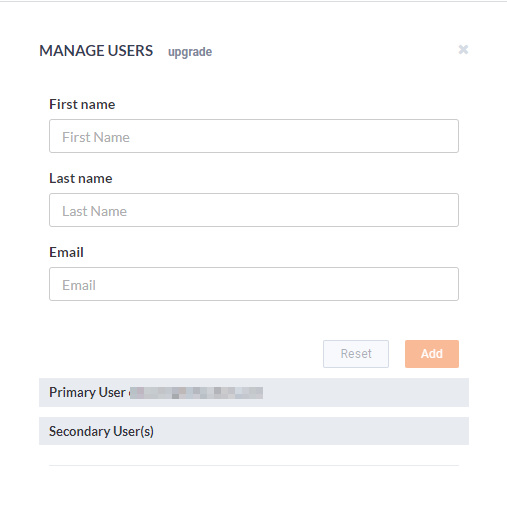
• First Name: Type the first name of the user.
• Last Name: Type the last name of the user.
• Email: Type the email address of the user.
• Reset: Click to clear the Manage User values.
• Add: Click to add the user to the list of secondary users.
• Primary User: Displays the primary user of the device when the device was registered with LiveAction. If multiple appliances are selected in the list of devices, the Primary User is not displayed.
• Secondary User(s): Displays any secondary users assigned to the device. If multiple appliances are selected in the list of devices, the Secondary User(s) are not displayed.
Template column headings
Descriptions of the columns displayed in the list of templates are provided below.
TIP: Below each of the column headings is a text box you can use to filter the templates displayed in the list of templates. To filter using the text box, simply enter a text string to display the templates that match the text string.
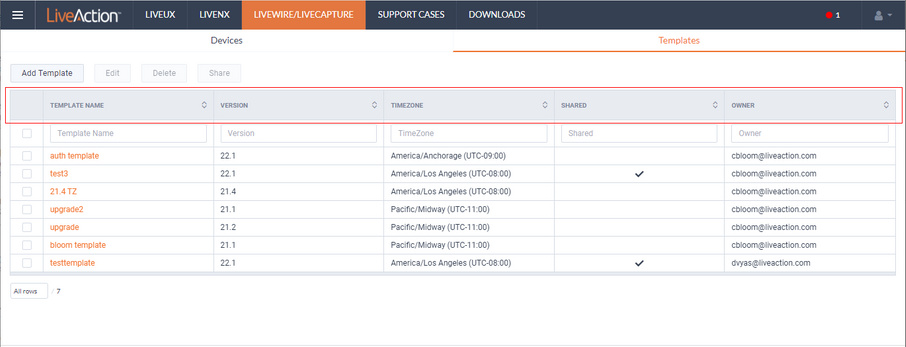
• Template Name: Displays the name of the template. Click the name to display details about the template.
• Version: Displays the version number of the template.
• Timezone: Displays the time zone of the template.
• Shared: Displays the users that have been shared with the device. Shared users can fully configure a device from DMS.
• Owner: Displays the owner of the device. There can only be one owner of the device.